Compare revisions of Analysis model
The Compare revisions of Analysis model workflow compares selected revisions of the analysis model. Thanks to this workflow, you can easily track changes made to your model and create tasks for your colleagues and partners (Bimplus task) or export tasks in excel or BCF files in case you want to go beyond the Bimplus CDE cooperation.
Compare Revision
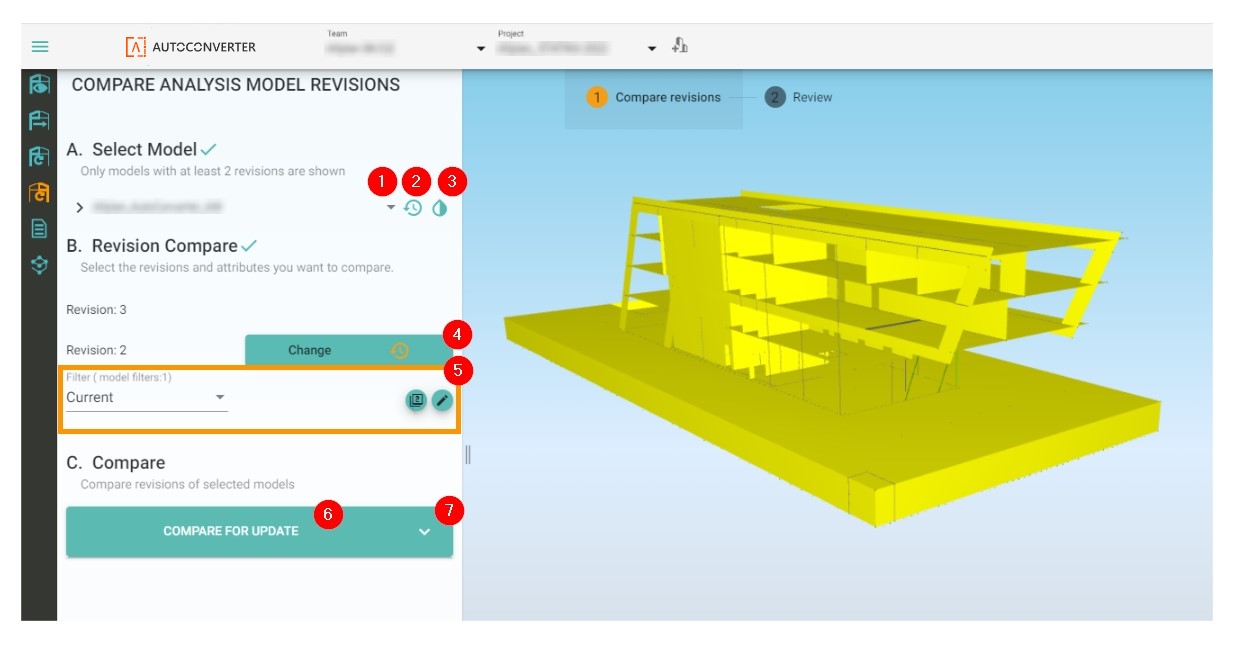
The first step of the Compare revisions of Analysis model workflow is to select the model, revisions, and general comparison scope. Then click the compare button (Figure 37).
(1) Select the model: Select the analysis model you want to use in the analysis model comparison. Only models with at least two revisions can be selected for comparison.
(2) Select the analysis revision you want to use in the revision comparison.
(3) Model transparency (toggle): Turn ON or OFF the transparency of the selected model (revision) in the 3D scene.
(4) Change revision: Select the second revision used in the revision comparison. The order of selected revisions does not play a role; the newer selected revision selected is compared to the older selected revision. (Same as in Update existing Analysis model from Structural model)
(5) Property filter: Select only the specific attributes you want to include in the comparison. The property filters work the same way as described for Update existing Analysis model from Structural model > Compare Structural Model Revisions.
(6) Compare for update button: Click on the Compare for update button to run the revision comparison. This comparison is designed to track the changes and create tasks.
(7) Arrow, Full compare: Click on the Full compare button to run the full comparison. Full compare compares the whole SAF file. Included in this comparison are changes such as newly created internal edges, modified lists of internal nodes of members, changed structural eccentricities, etc. The result of this comparison is available in Table Overview only. Complete SAF files behind the analysis models are being compared. You can use this comparison in case you are interested in tracking very detailed changes in the analysis model.
Notes: When you have no available models in model selection (1), please check if you have in the project analysis model with at least two revisions.
Review and Create Tasks
Once you press Compared for update, the results are shown in the 3D scene. The result is presented based on what was changed (e.g., newly added or deleted Modified cross-section, Area or Length of 1D members, etc.). Changes are also differentiated by color (Figure 38).
-
Orange - Modified properties. Example: Changed cross-section (HEA300 -> HEA400).
-
Light green - Deleted objects. Example: Removed column (analysis element).
-
Dark green - New objects. Example: Newly added opening in slab or wall.
-
Blue - Modified objects (geometrically). Example: Extended beam (change in Length) or cut slab (change in Area).
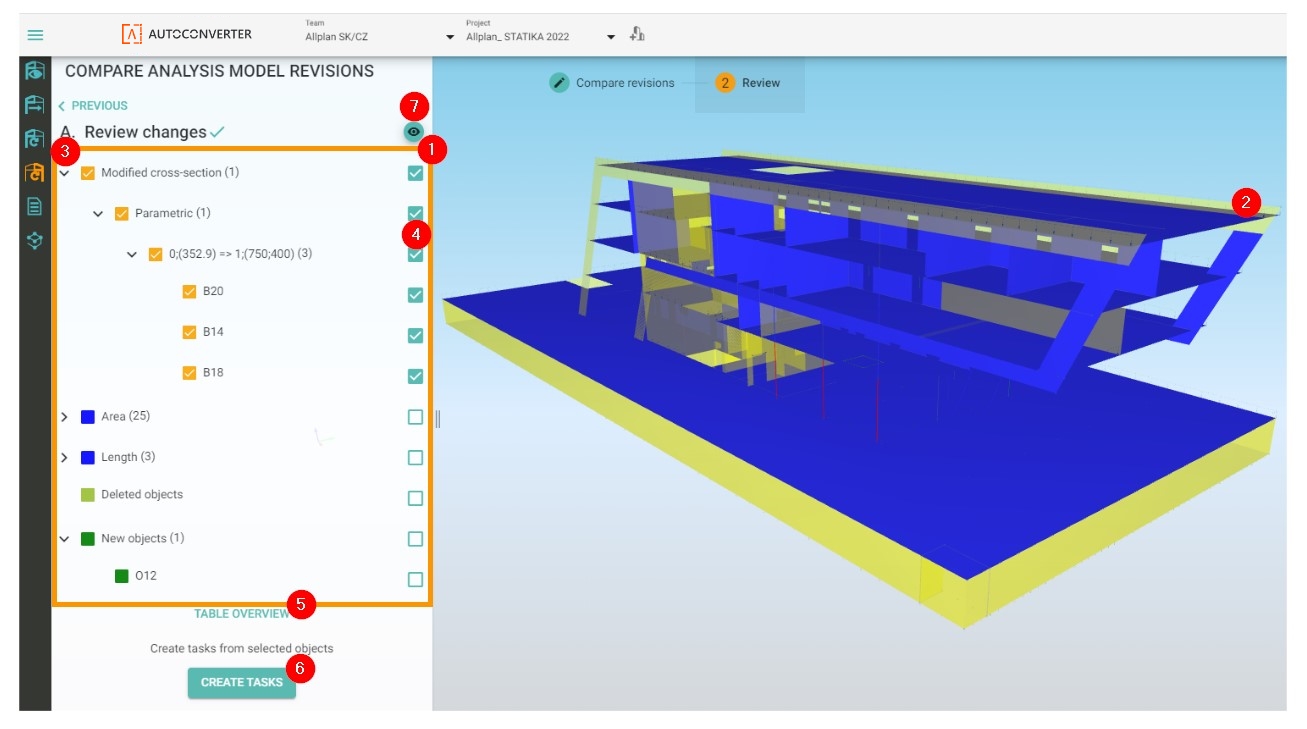
Figure 38: Review changes
Review of changes:
(1) Result of revision comparison: The result of the revision comparison is presented in the left workflow panel.
(2) Result displayed in 3D scene: The result of the comparison is available also in the 3D scene (including colors indicating the type of change).
(3) Expand changes: You can expand each type of change to a deeper and more specific description of each change. Expansion can be done on multiple levels deep. Names of all analysis objects affected by the specific change are shown in the last level.
(4) Select change box: Click on the selection box for changes you want used for task creation. For example, when you select a change that is associated with a changed dimension of a parametric cross-section, all members affected by that change are selected automatically (B20, B14, and B18). In case you want to communicate a change related only to B14, select only B14 in the last level of the change tree.
(5) Table Overview: Click on Table Overview for opening a new window with a detailed overview of all changes (Figure 39).
(6) Create task: Click this button to create a task. A window with the task specification will appear (Figure 40).
(7) Analysis model visibility (toggle): Toggle the visibility of the selected analysis model in the scene. When the model is set to visible, it is always transparent.
Table Overview (Figure 39):
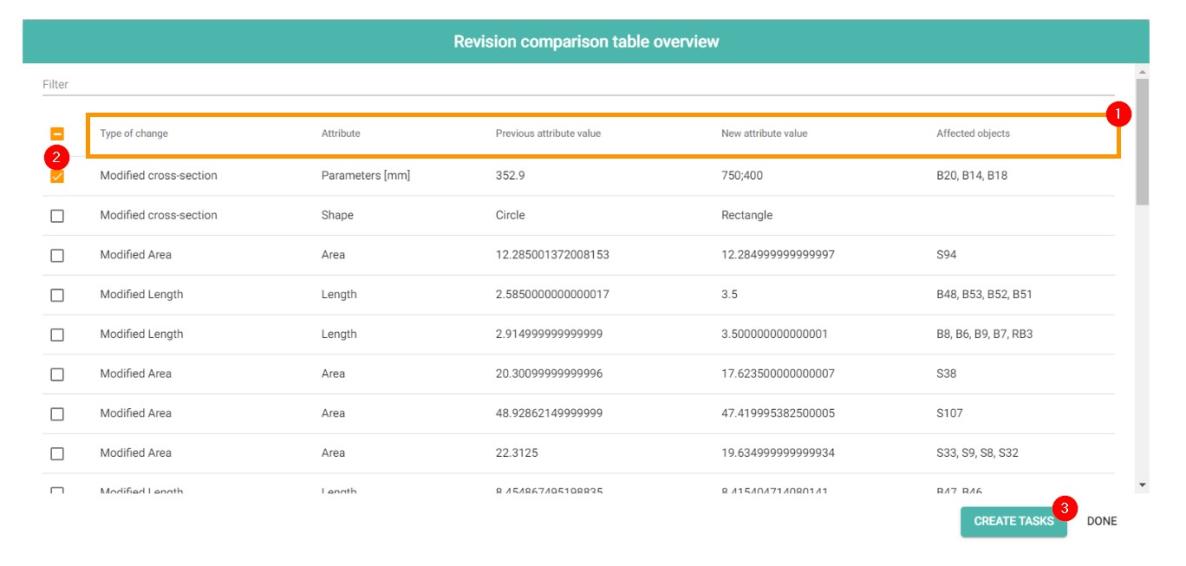
(1) Table headers:
Type of change - indication for what was changed
Attribute - attribute affected by a change
Previous attribute value - attribute value for an older revision in comparison
New attribute value - attribute value in newer selected revision
Affected objects - list of analysis objects names affected by a change
(2) Selection check box: You can also select changes in Table Overview for task creation.
(3) Create a task: Click on create a task button for opening a task creation window. All selected changes (2) will be presented in a task.
Task creation (Figure 40):
Task creation provides you with an option for how to communicate specific changes to your colleagues and partners. Each task has its own description, priority, responsible person, and date until it should be resolved. All tasks are available on Bimplus immediately once created in the ALLPLAN AutoConverter. Further work with the task is handled on Bimplus only (editing a task, changing a state, adding notes and views etc.) A task can be exported to excel or a BCF file from Bimplus for further distribution.
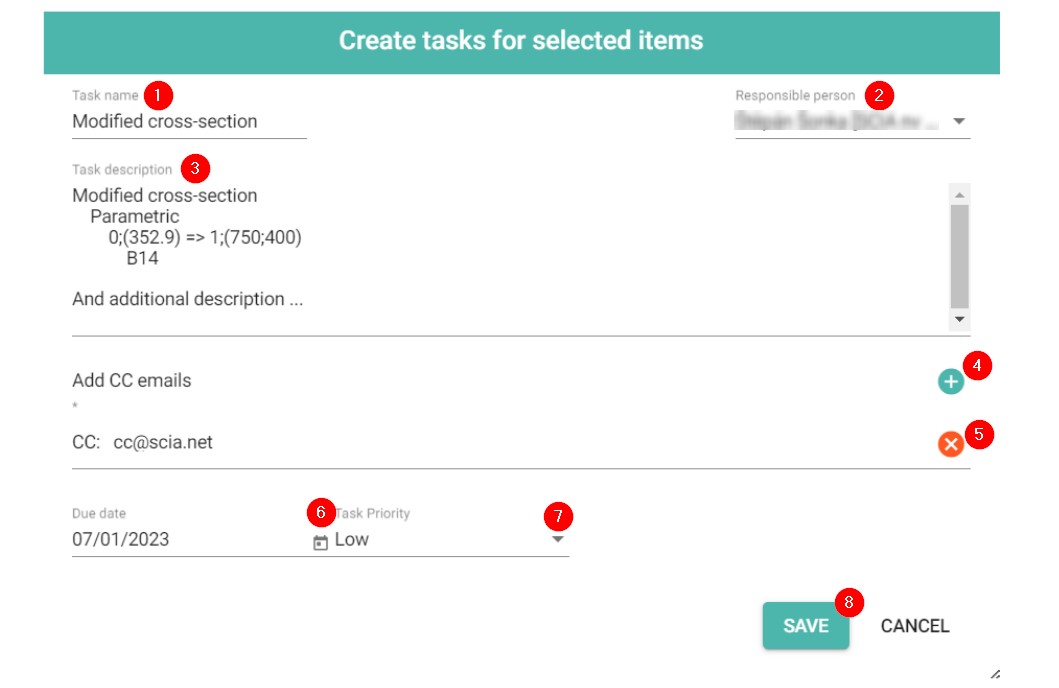
(1) Task name: Task name is predefined based on the type of change. Click in the text field for editing the name.
(2) Responsible person (Drop down): Select a responsible person for a task. List of people in the drop down is based on people with access to the project.
(3) Task description: Task description is predefined based on the type of change. Click in text field for editing the task description.
(4) Add people to CC: You can type in an email of a person who should be informed about a task.
(5) Remove people from CC: Remove an email address from a CC by clicking on the cross button.
(6) Time frame (Calendar selection): Set a date until when the task should be resolved.
(7) Task priority (Drop down): Set the right priority for a created task - High, Medium, or Low. Setting the right priority will help your colleagues in prioritizing the urgent tasks first.
(8) Save button: Click Save to create a new task.
Note: Once a task is created, the screen shot of the current view on the analysis model is taken and it is part of a task that is visible in the Bimplus viewer. The persons that are mentioned in the task (the responsible and the people in the CC) will automatically receive an email that a task has been created for them. There is a link in the email that directly launches Bimplus viewer and loads the right project and model. Here you can use the Task manager to see all tasks appointed to you and you can process them.
Tasks on Bimplus
Tasks created in the ALLPLAN AutoConverter can be viewed, further edited and exported to BCF or excel files using Bimplus. For viewing the tasks on the Bimplus portal, follow the steps below.
(1) Open the project menu (Figure 41).
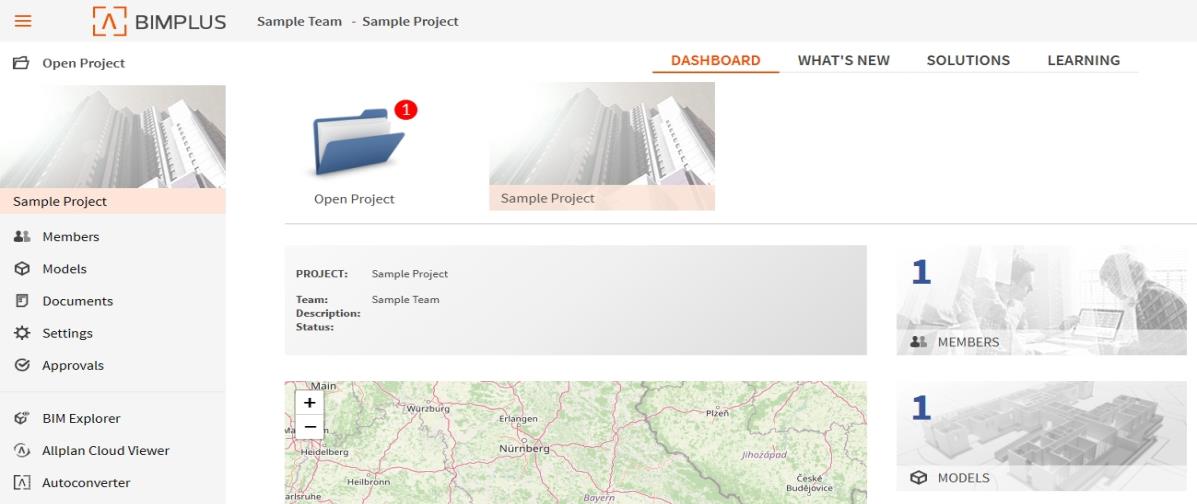
Figure 41: Open project on Bimplus (2) Select the team and project on the project menu. The project stores the model with the created issue (Figure 42).
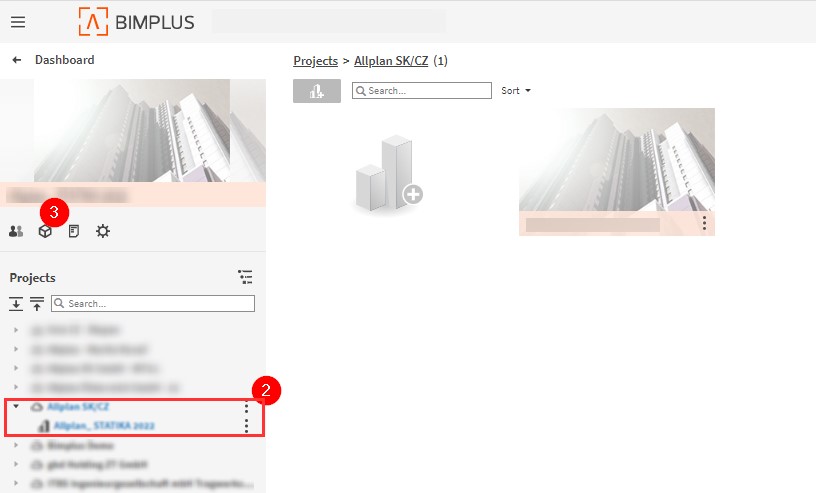
Figure 42: Open right team and project on Bimplus (3) Click on the model icon to see available models in the project (Figure 42).
(4) Double-click on the structural model which is the issue related to opening the model in Bimplus viewer (Figure 43).

Figure 43: Open the model on Bimplus (5) Click on the Issue manager icon found on the left menu of the Bimplus viewer (Figure 44).
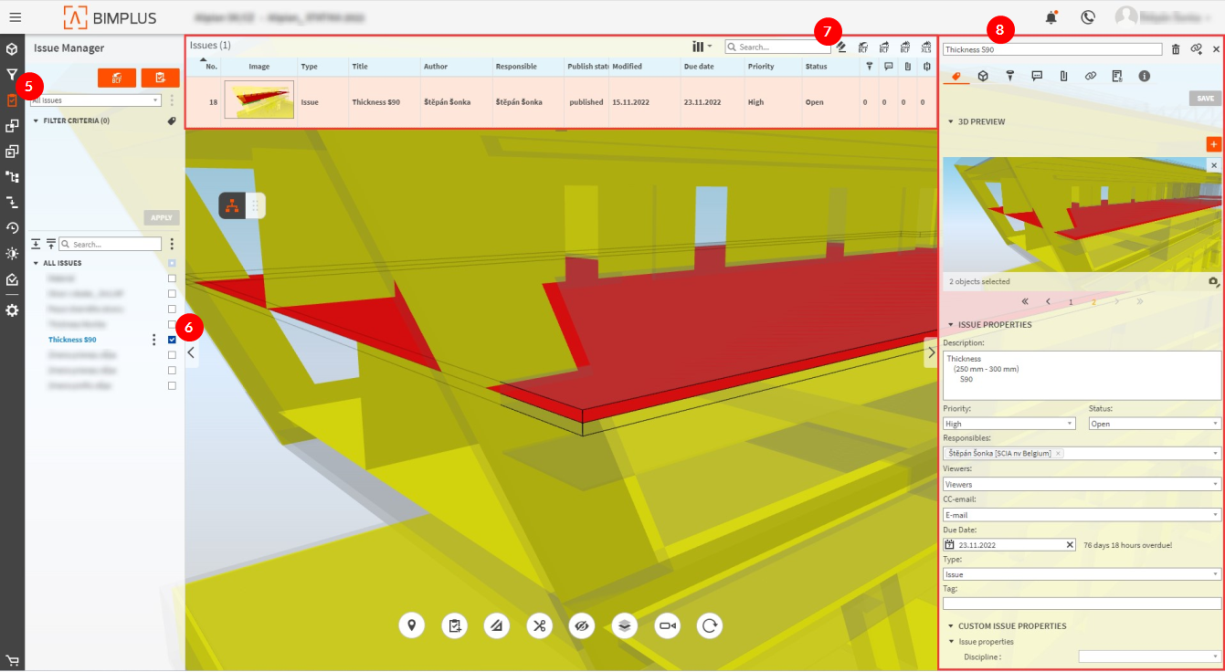
Figure 44: Bimplus viewer with opened issue (6) Select the issue from the issue list.
(7) The Issues table is activated at the top of the Bimplus viewer and provides the option to export issues to BCF and XLS format.
(8) The Issue property panel is activated to the right of the Bimplus viewer. Your previously entered data such as description, priority, etc. are displayed. These fields can be edited here as well.

